"OCS Newsletter Exclusive: Warrior Nun 3D Sculpting by Gisela @kcgisela"


OCS: Name/Twitter Handle / project website?
Name: Gisela
Twitter: @kcgisela
Portfolio website: https://www.artstation.com/kcgisela
YouTube where i do the statues reveals: https://youtube.com/@giselaesteves
OCS: A little about yourself?
My name is Gisela, I was born in Switzerland to Portuguese parents, and I have been living in the UK for the last 7 years. I’m a full-time radiographer, but outside of work, I like to 3D print and 3D model characters and props. I love playing video games and enjoy spending time with my family and friends. Growing up I did judo but unfortunately stopped practicing when I got my blue belt. I also play D&D and I am a huge Critical Role fan.
OCS: How did you get into 3D sculpting?
I started 3D sculpting during the pandemic really, as a healthcare worker I found myself getting increasingly tired and stressed out and I knew I needed to find an outlet to help me relax and de-stress. That's when I discovered the world of 3D sculpting. I’ve always been interested in video games and have collected many art books from various games and movies over the years. I figured that this was the perfect opportunity to explore this area further and try my hand at 3D sculpting.
OCS: How did you discover you had THE talent to create these templates and items?
When I first started 3D sculpting, it was a bit overwhelming, to say the least. The software was complex and confusing, and I wasn't sure where to even begin. But I was determined to learn, so I kept working and trying. I followed some online tutorials and even enrolled in a few courses to improve my skills. So, to be honest I just kept trying.
I remember creating my very first 3D model from scratch: a snowman for one of the courses. And I kid you not, it was one of the most difficult and frustrating things I had ever done at the time. Looking back on it now, I'll have to laugh because it was so bad! That snowman gives me nightmares, but at the same time, it's a reminder of how far I've come. I was not able to find the snowman model, but these are some of the first models I made during my first online course.
OCS: What is your process and program do you use to create your sculptures?
I create my 3D sculptures using a software called ZBrush, which is a very powerful tool that allows me to sculpt in a digital form. It is like working with clay, but in a digital environment. For people who want to start 3D modeling I probably recommend using Blender as this one is a free software that already allows you to create a lot with it.
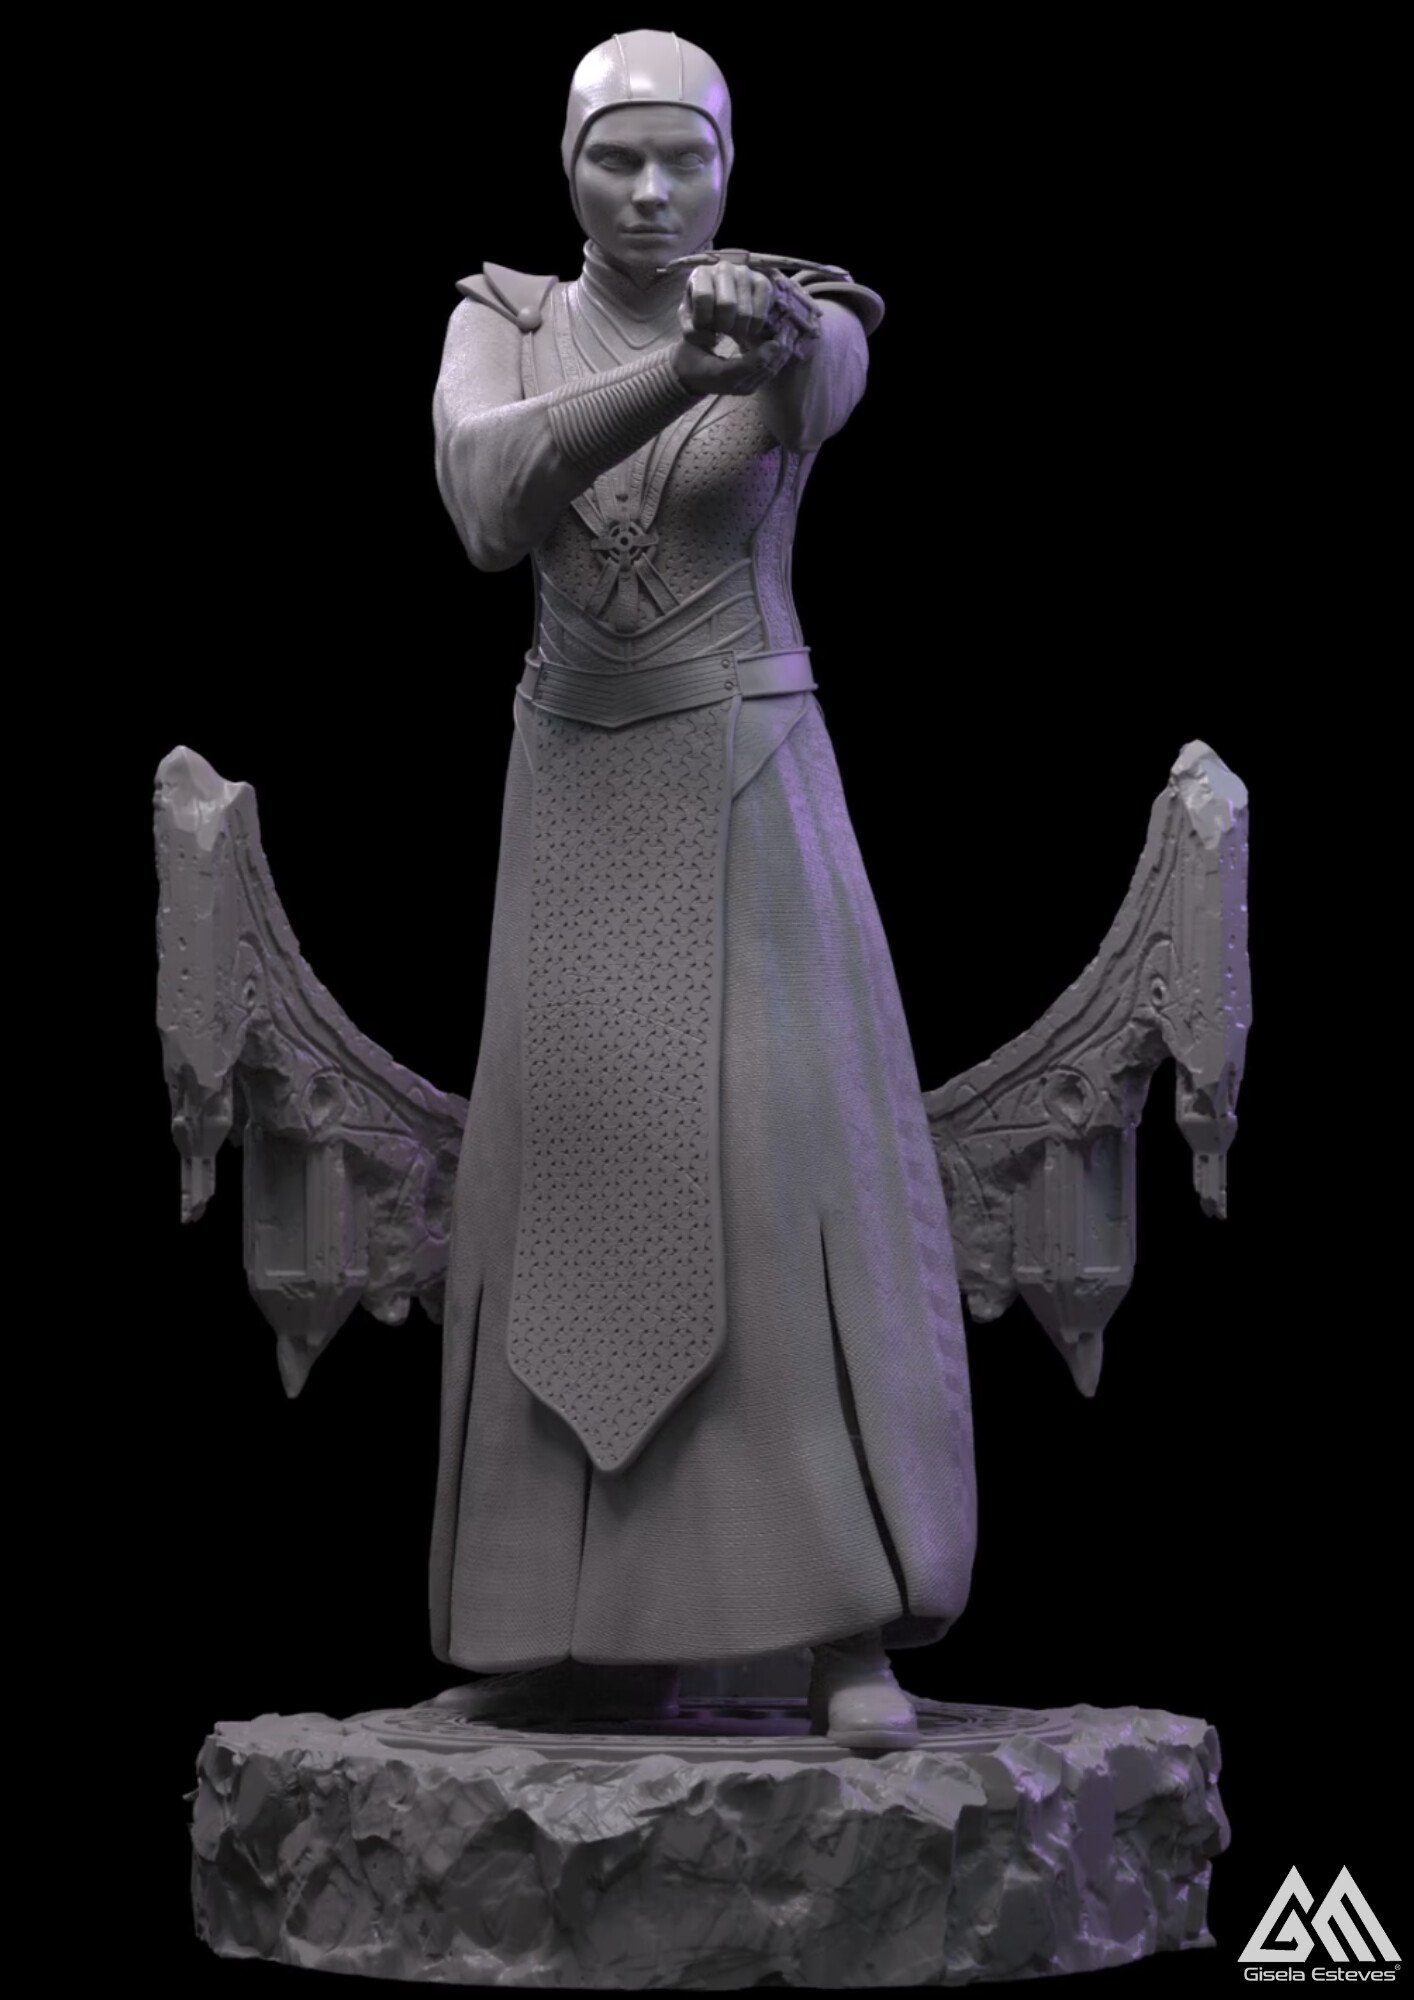
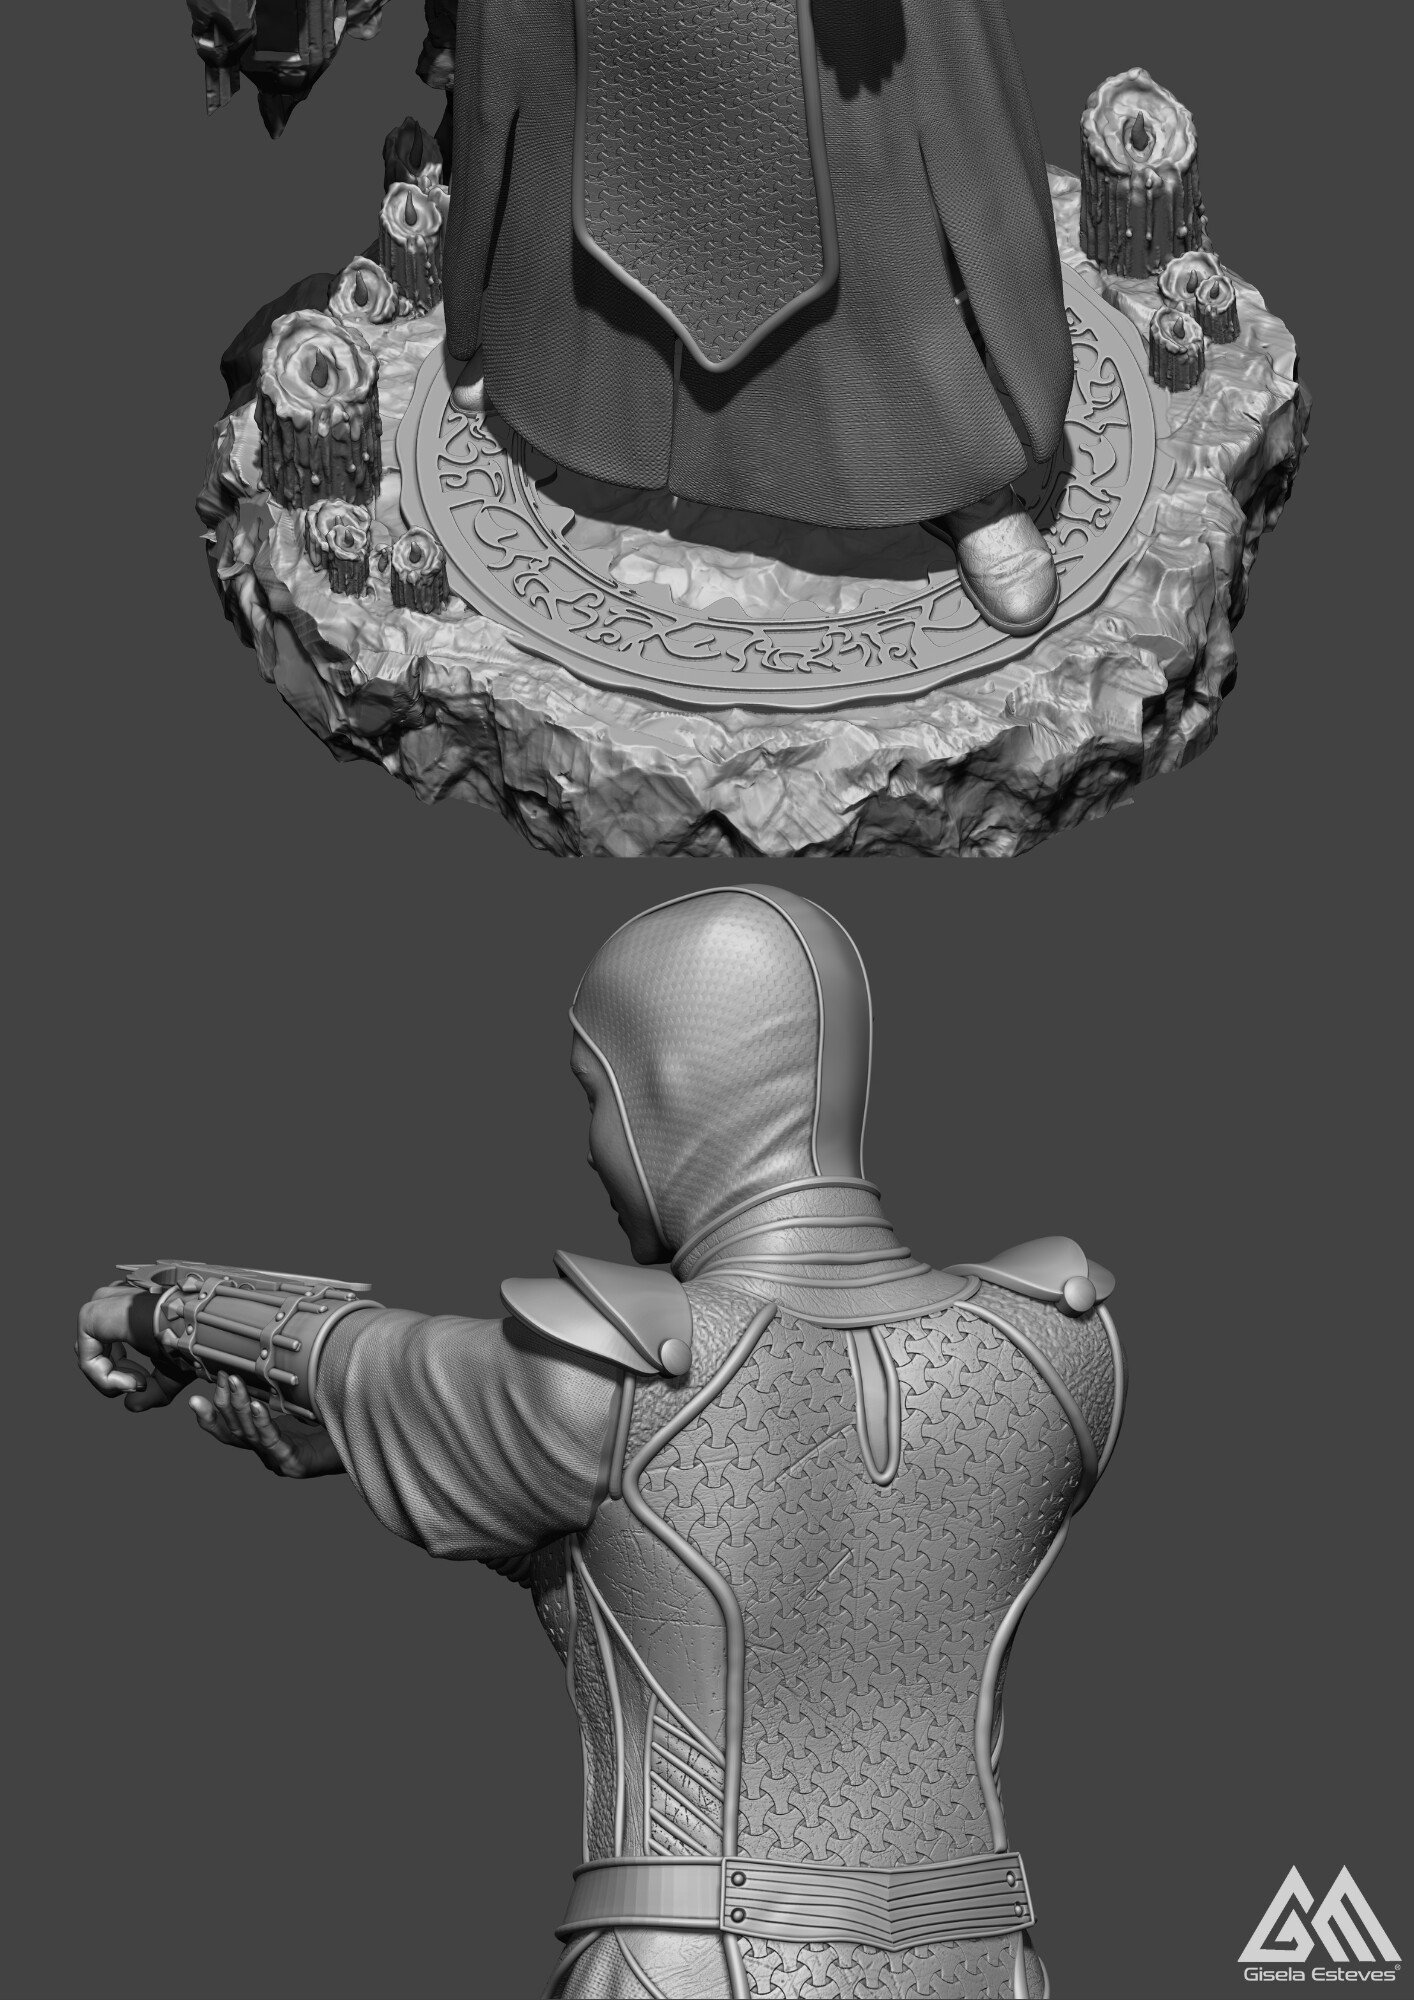
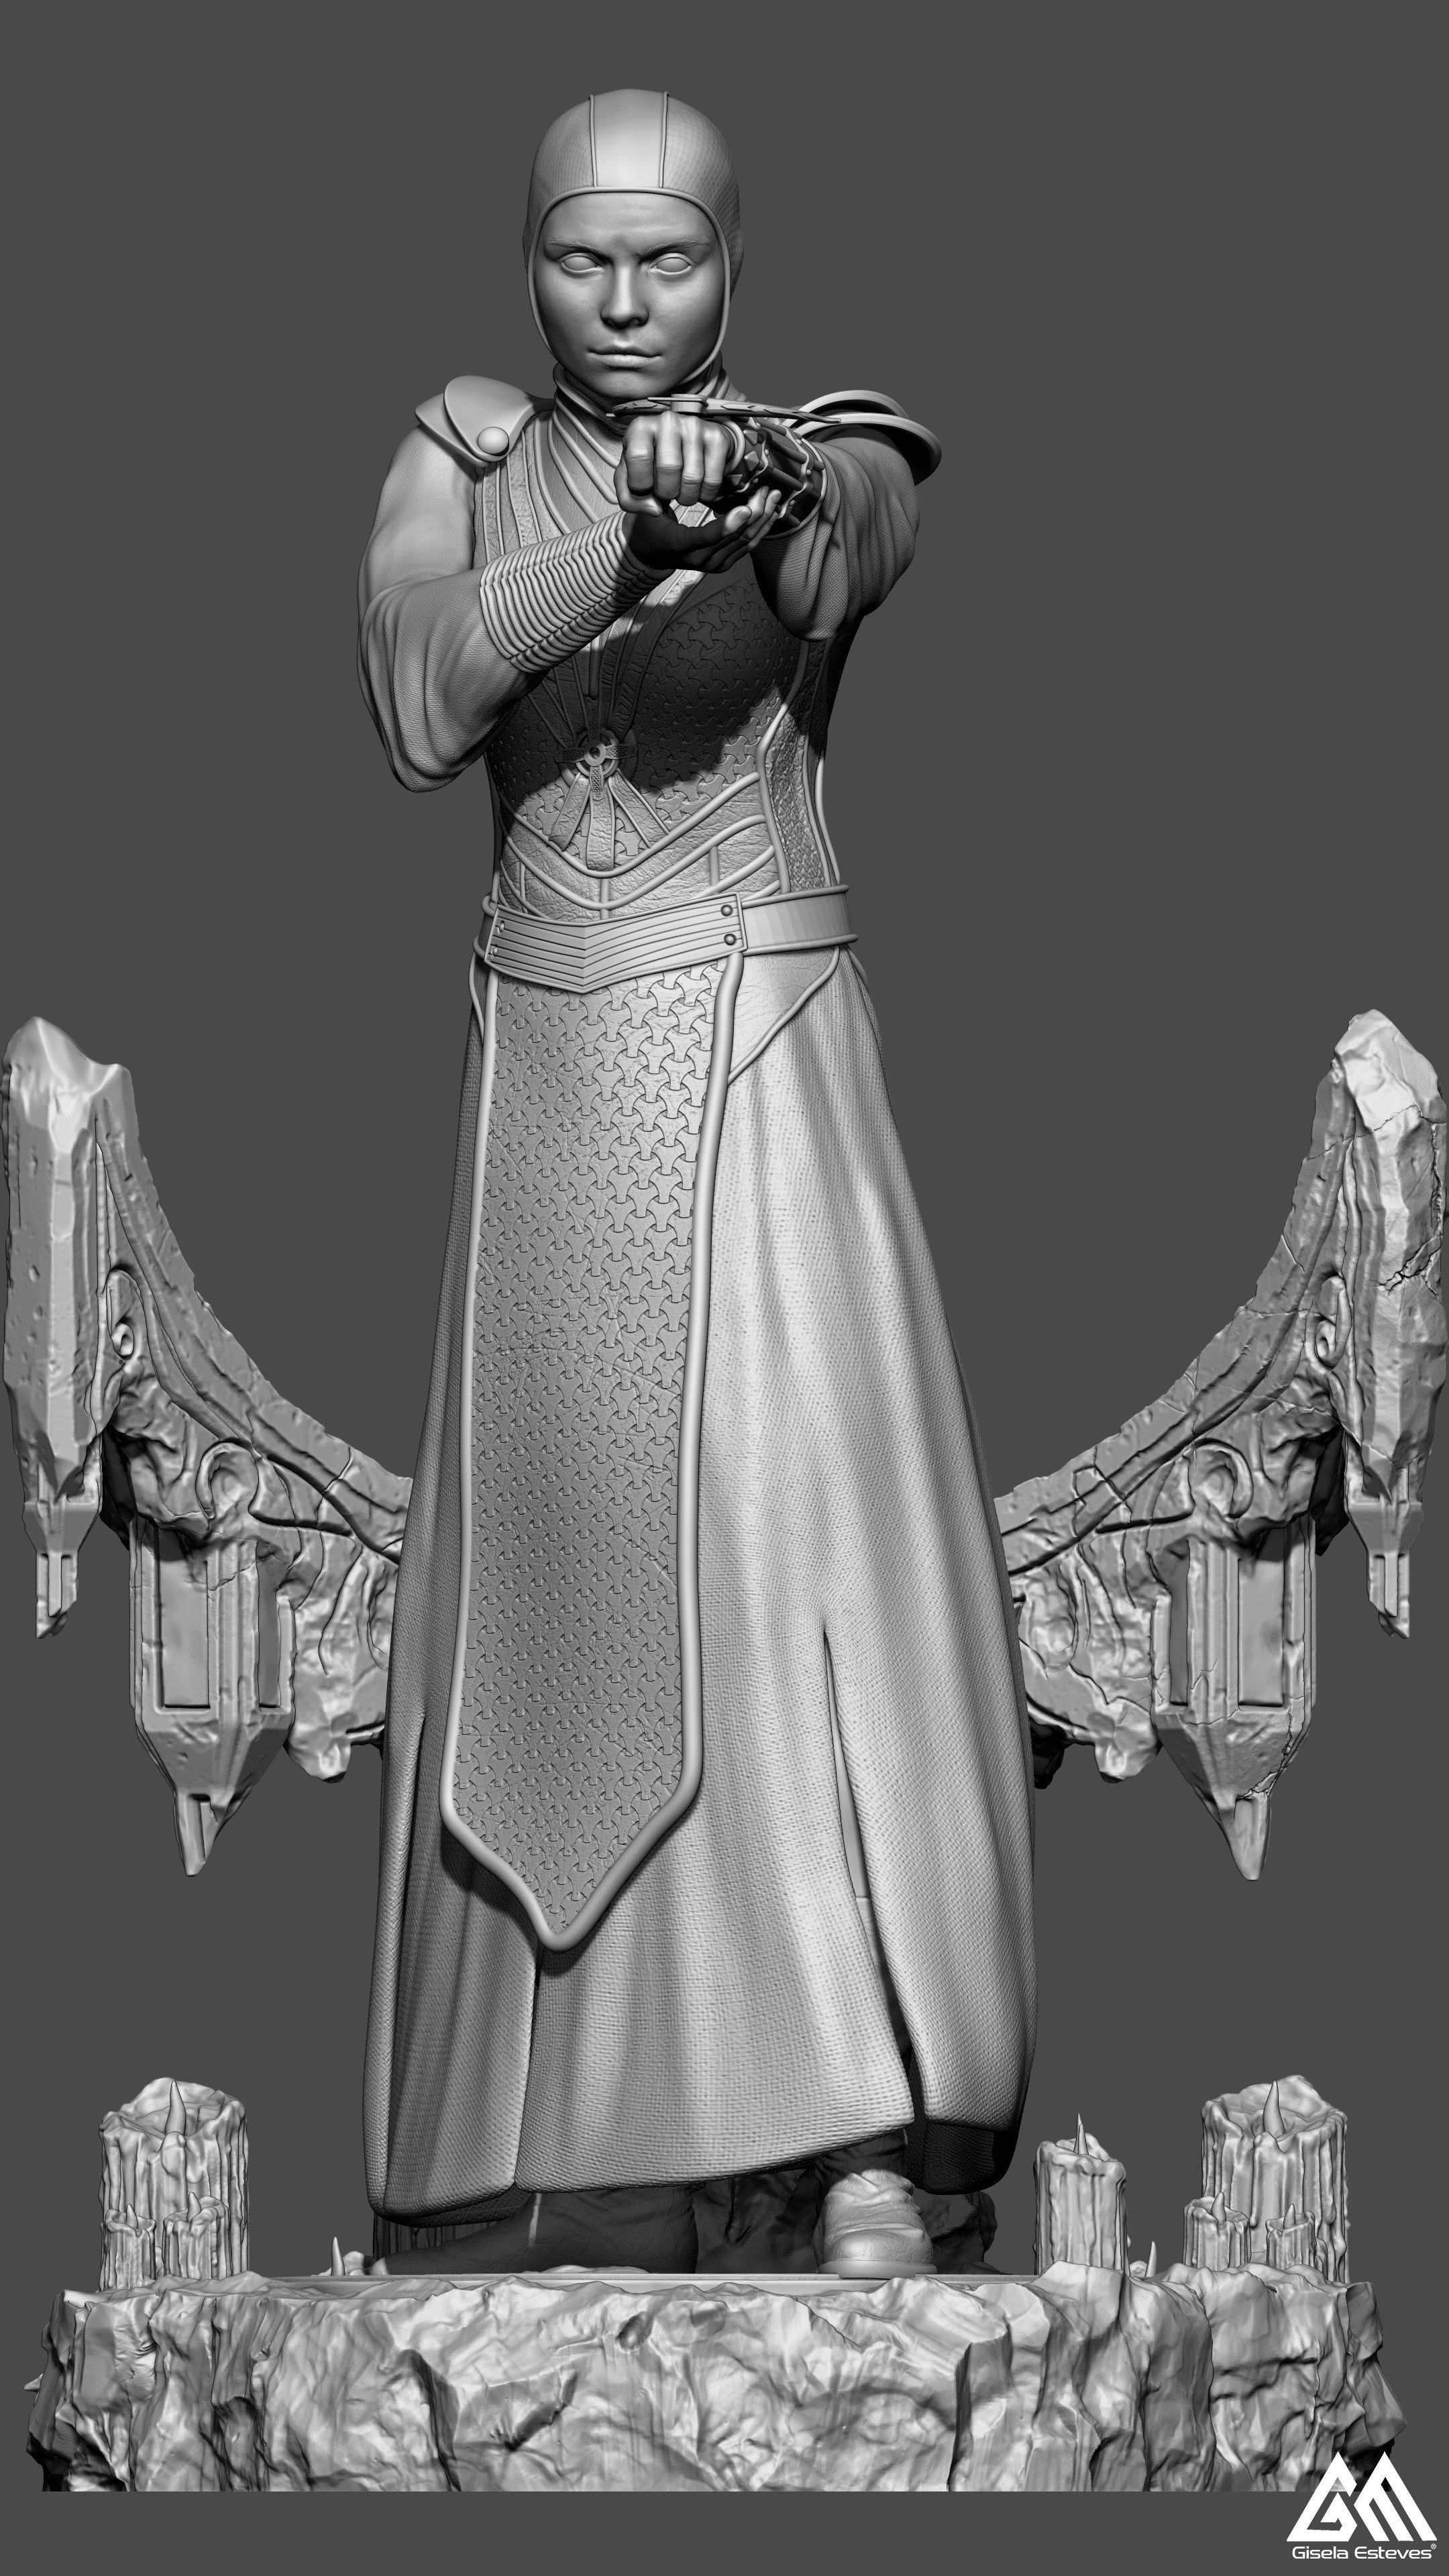
When I'm creating models for 3D printing, there are a few things I need to consider. 3D printers have specific dimensions and printing areas, so I usually have to separate my files into different parts to ensure that everything will fit into the printer. The most important thing when modeling these collectibles, I would say is aesthetics, so usually I try to avoid separating the files in visible areas so that the model looks seamless. For example when I created Beatrice, I separated the model into 15 different parts as shown in the picture (each color is a different part), this way I can easily fit everything in my printers, and it will also make it easier to paint.
To print my collectibles, I prefer to use a Resin 3D printer, which has better resolution and can print small parts while retaining all the details. My main 3D printers are from Anycubic. I have an Anycubic mono X and an Anycubic M3 Max that is perfect for bigger projects like Beatrice and the other statues I make.
OCS: Can you explain how the digital environment is like working with clay? What does it do that makes it like the real thing?
The program that I use is called ZBrush. This program offers a range of tools and features that simulate traditional clay, such as brushes. Bellow is a picture of how my zbrush interface looks like.
Compared to traditional clay sculpting, Zbrush has several advantages, I would say one of the biggest advantages is speed, with zbrush I can work much faster than I could with physical tools and materials. Additionally, Zbrush allows me to experiment with different designs and shapes without the need to start from scratch each time, and to easily undo mistakes. Its also way less messy 😊
Here is an example of some brushes available with the program.
Although there are still some similarities to traditional clay sculpting, for example, just like traditional clay, I can build up my model by adding and shaping material, or remove material to create negative spaces.
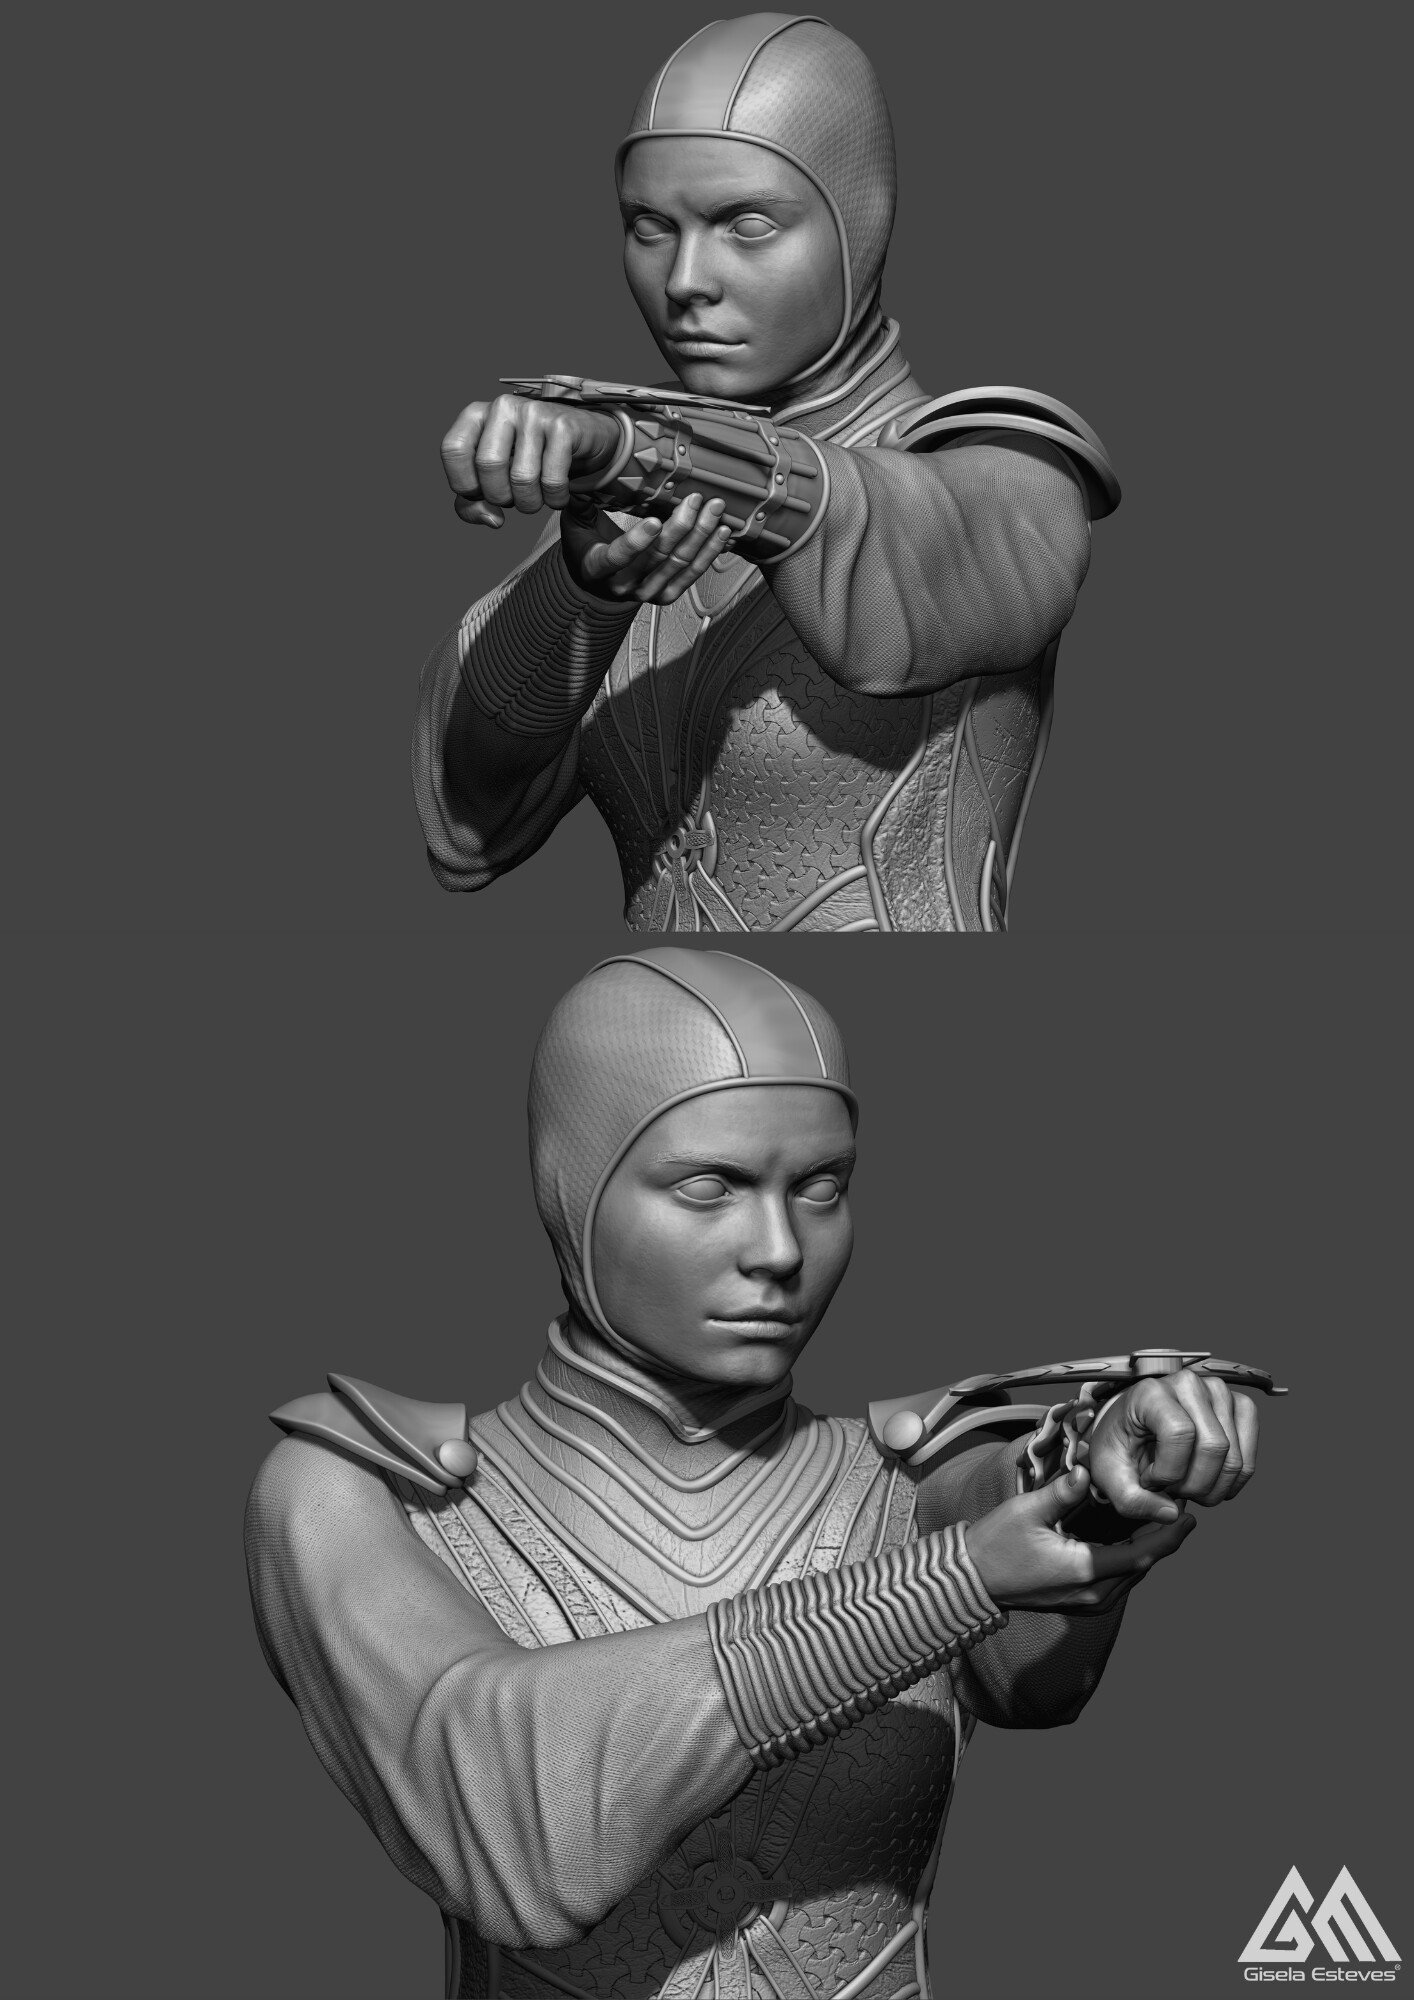
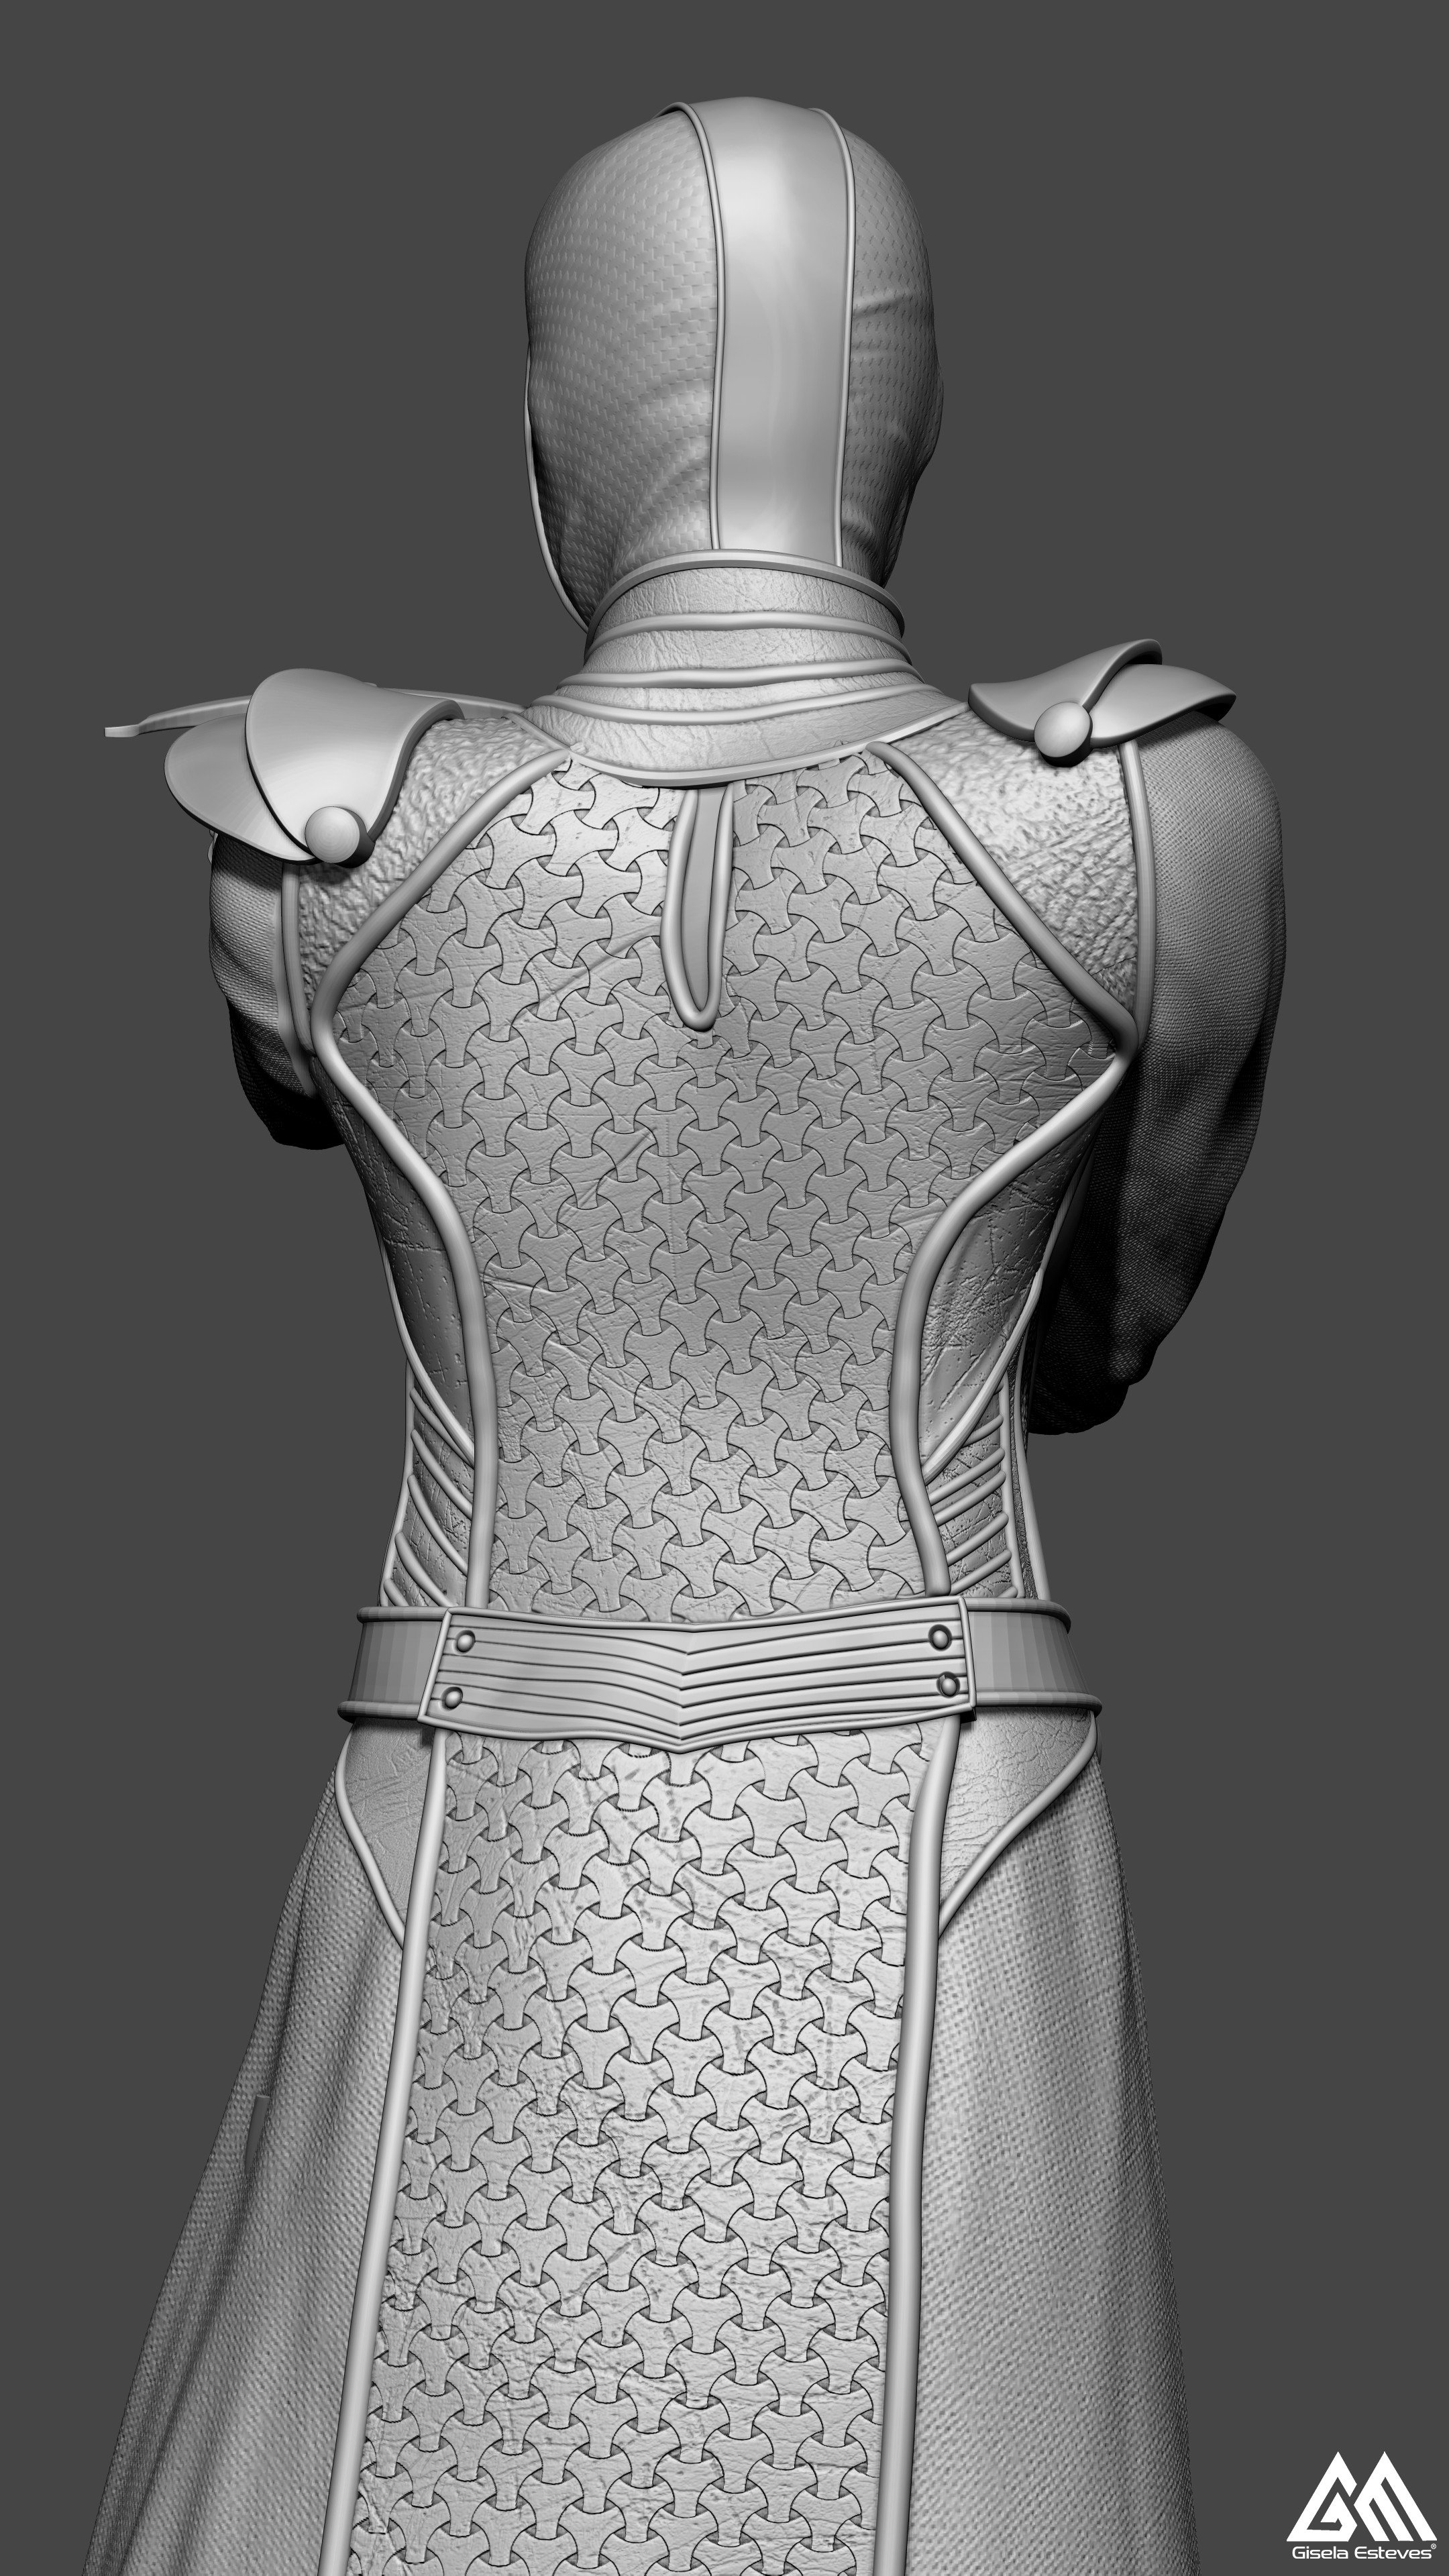
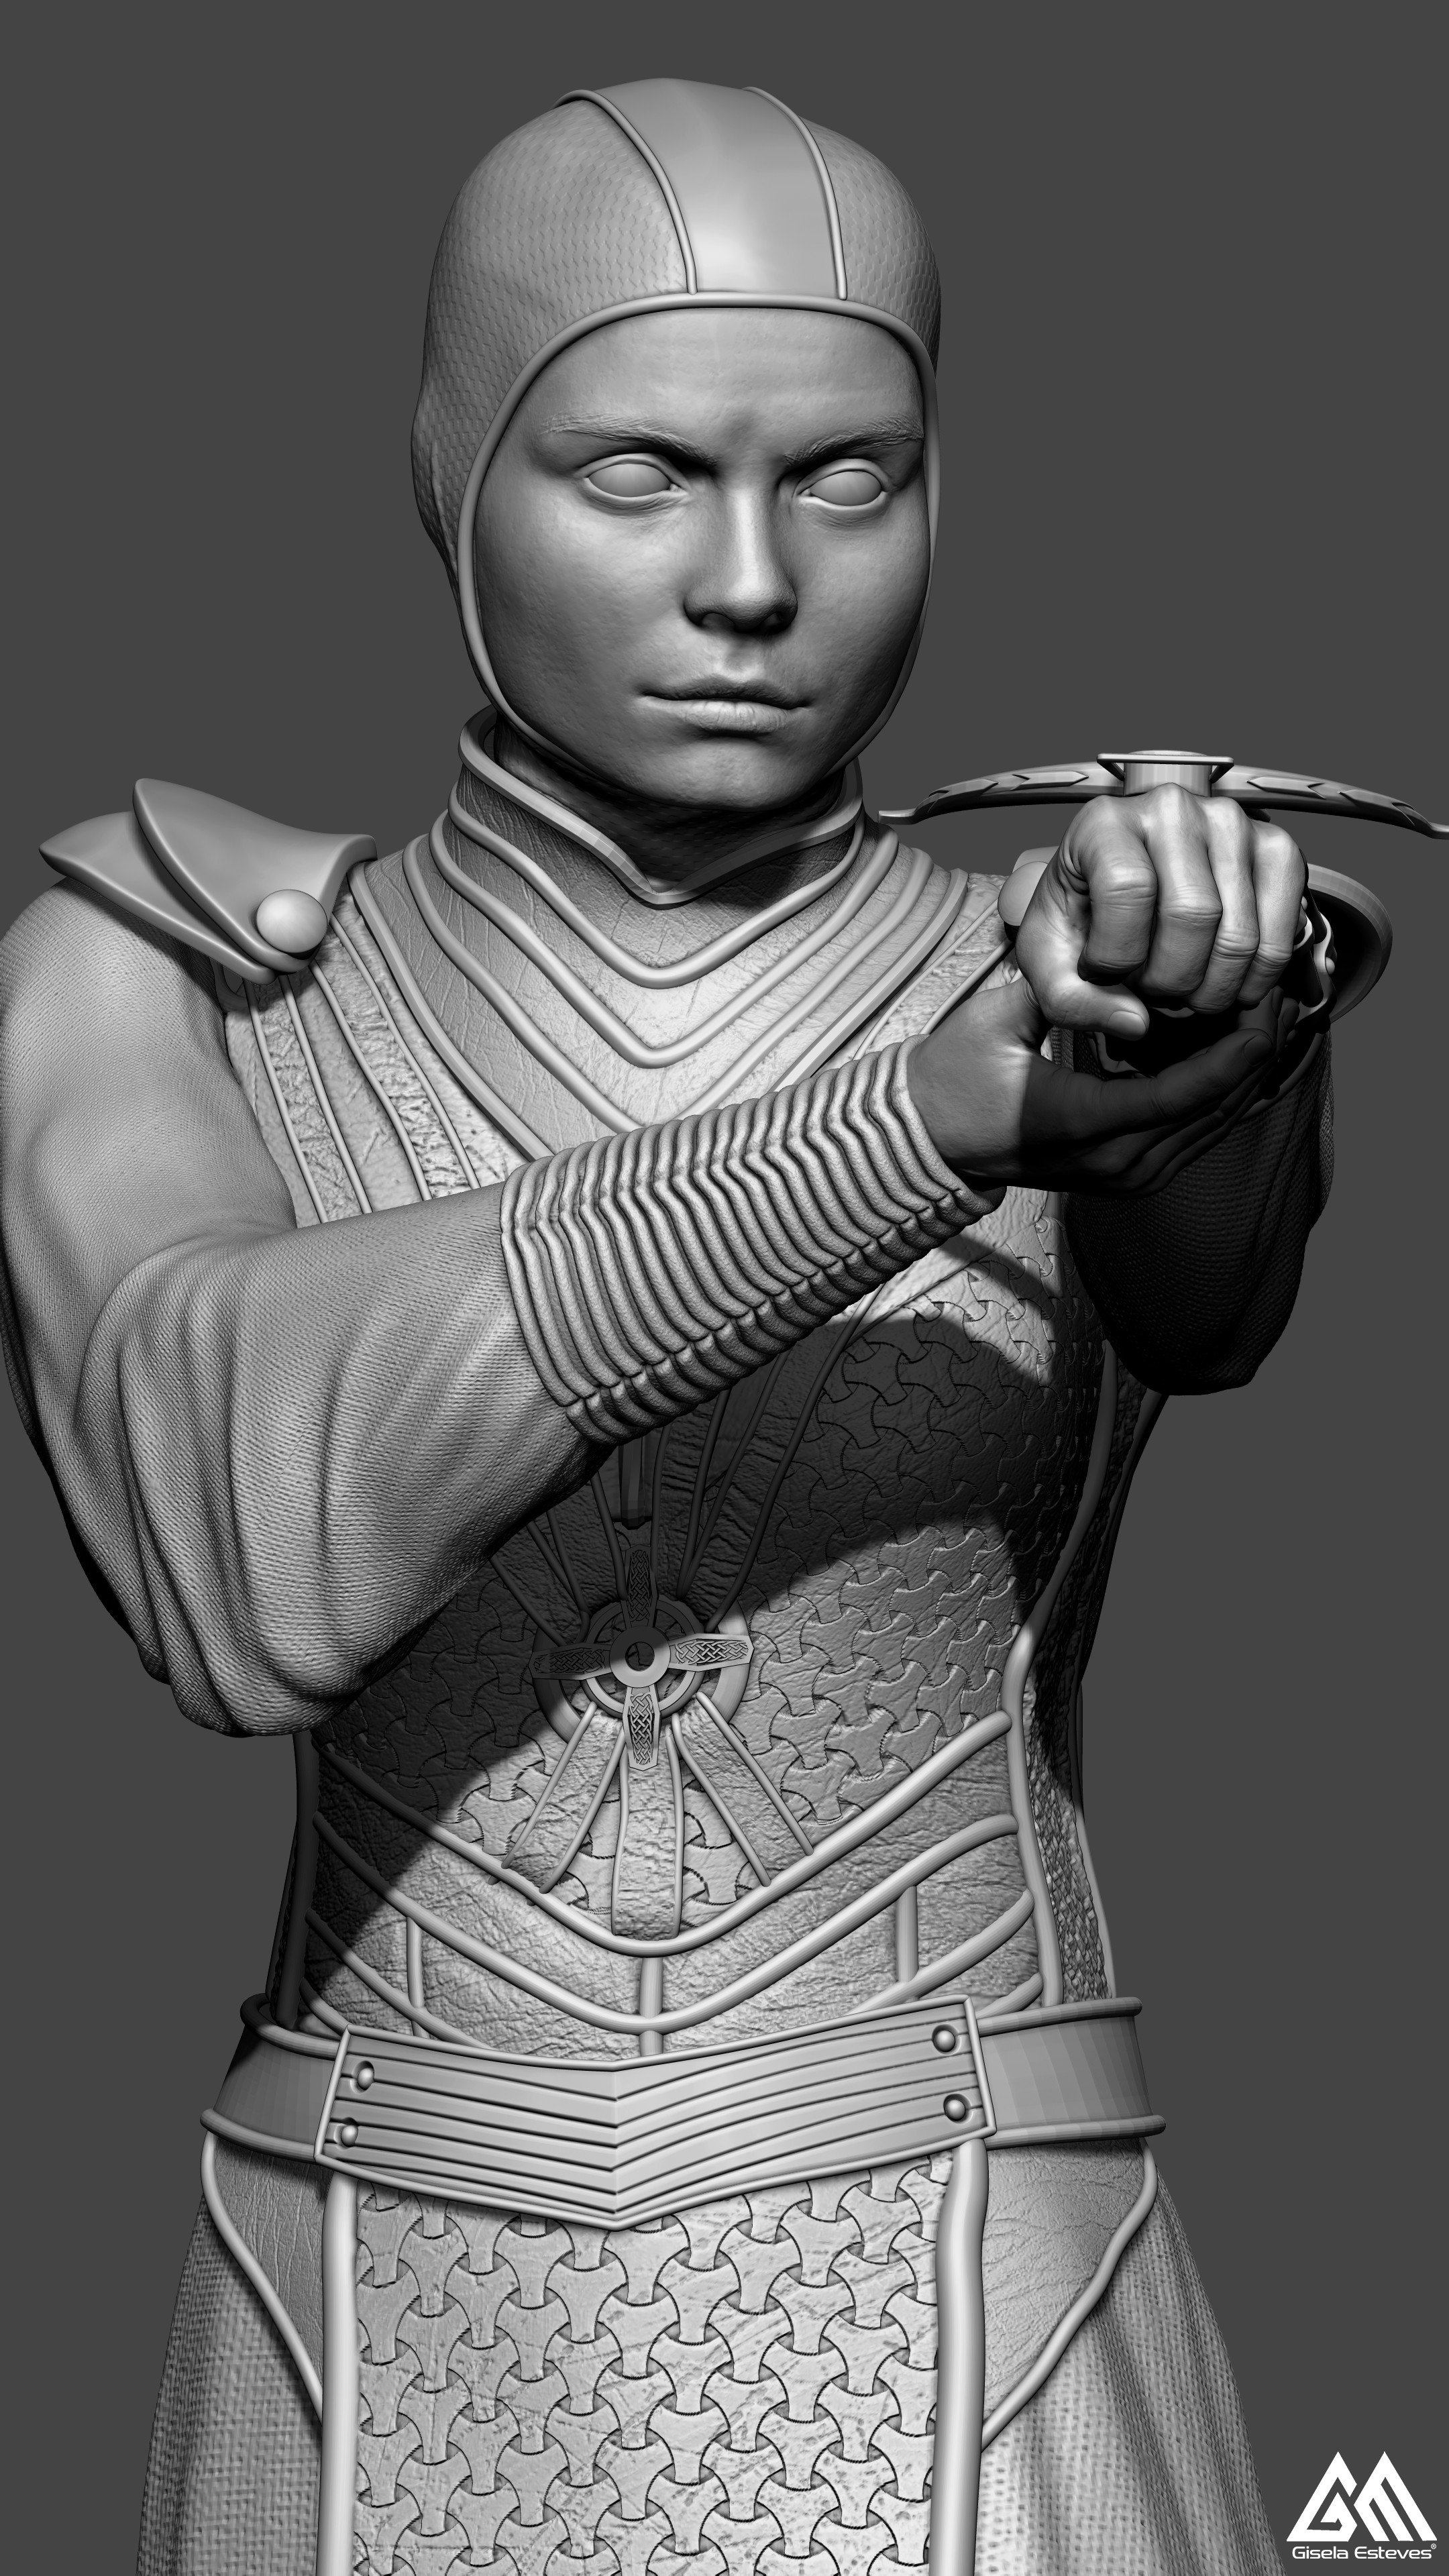
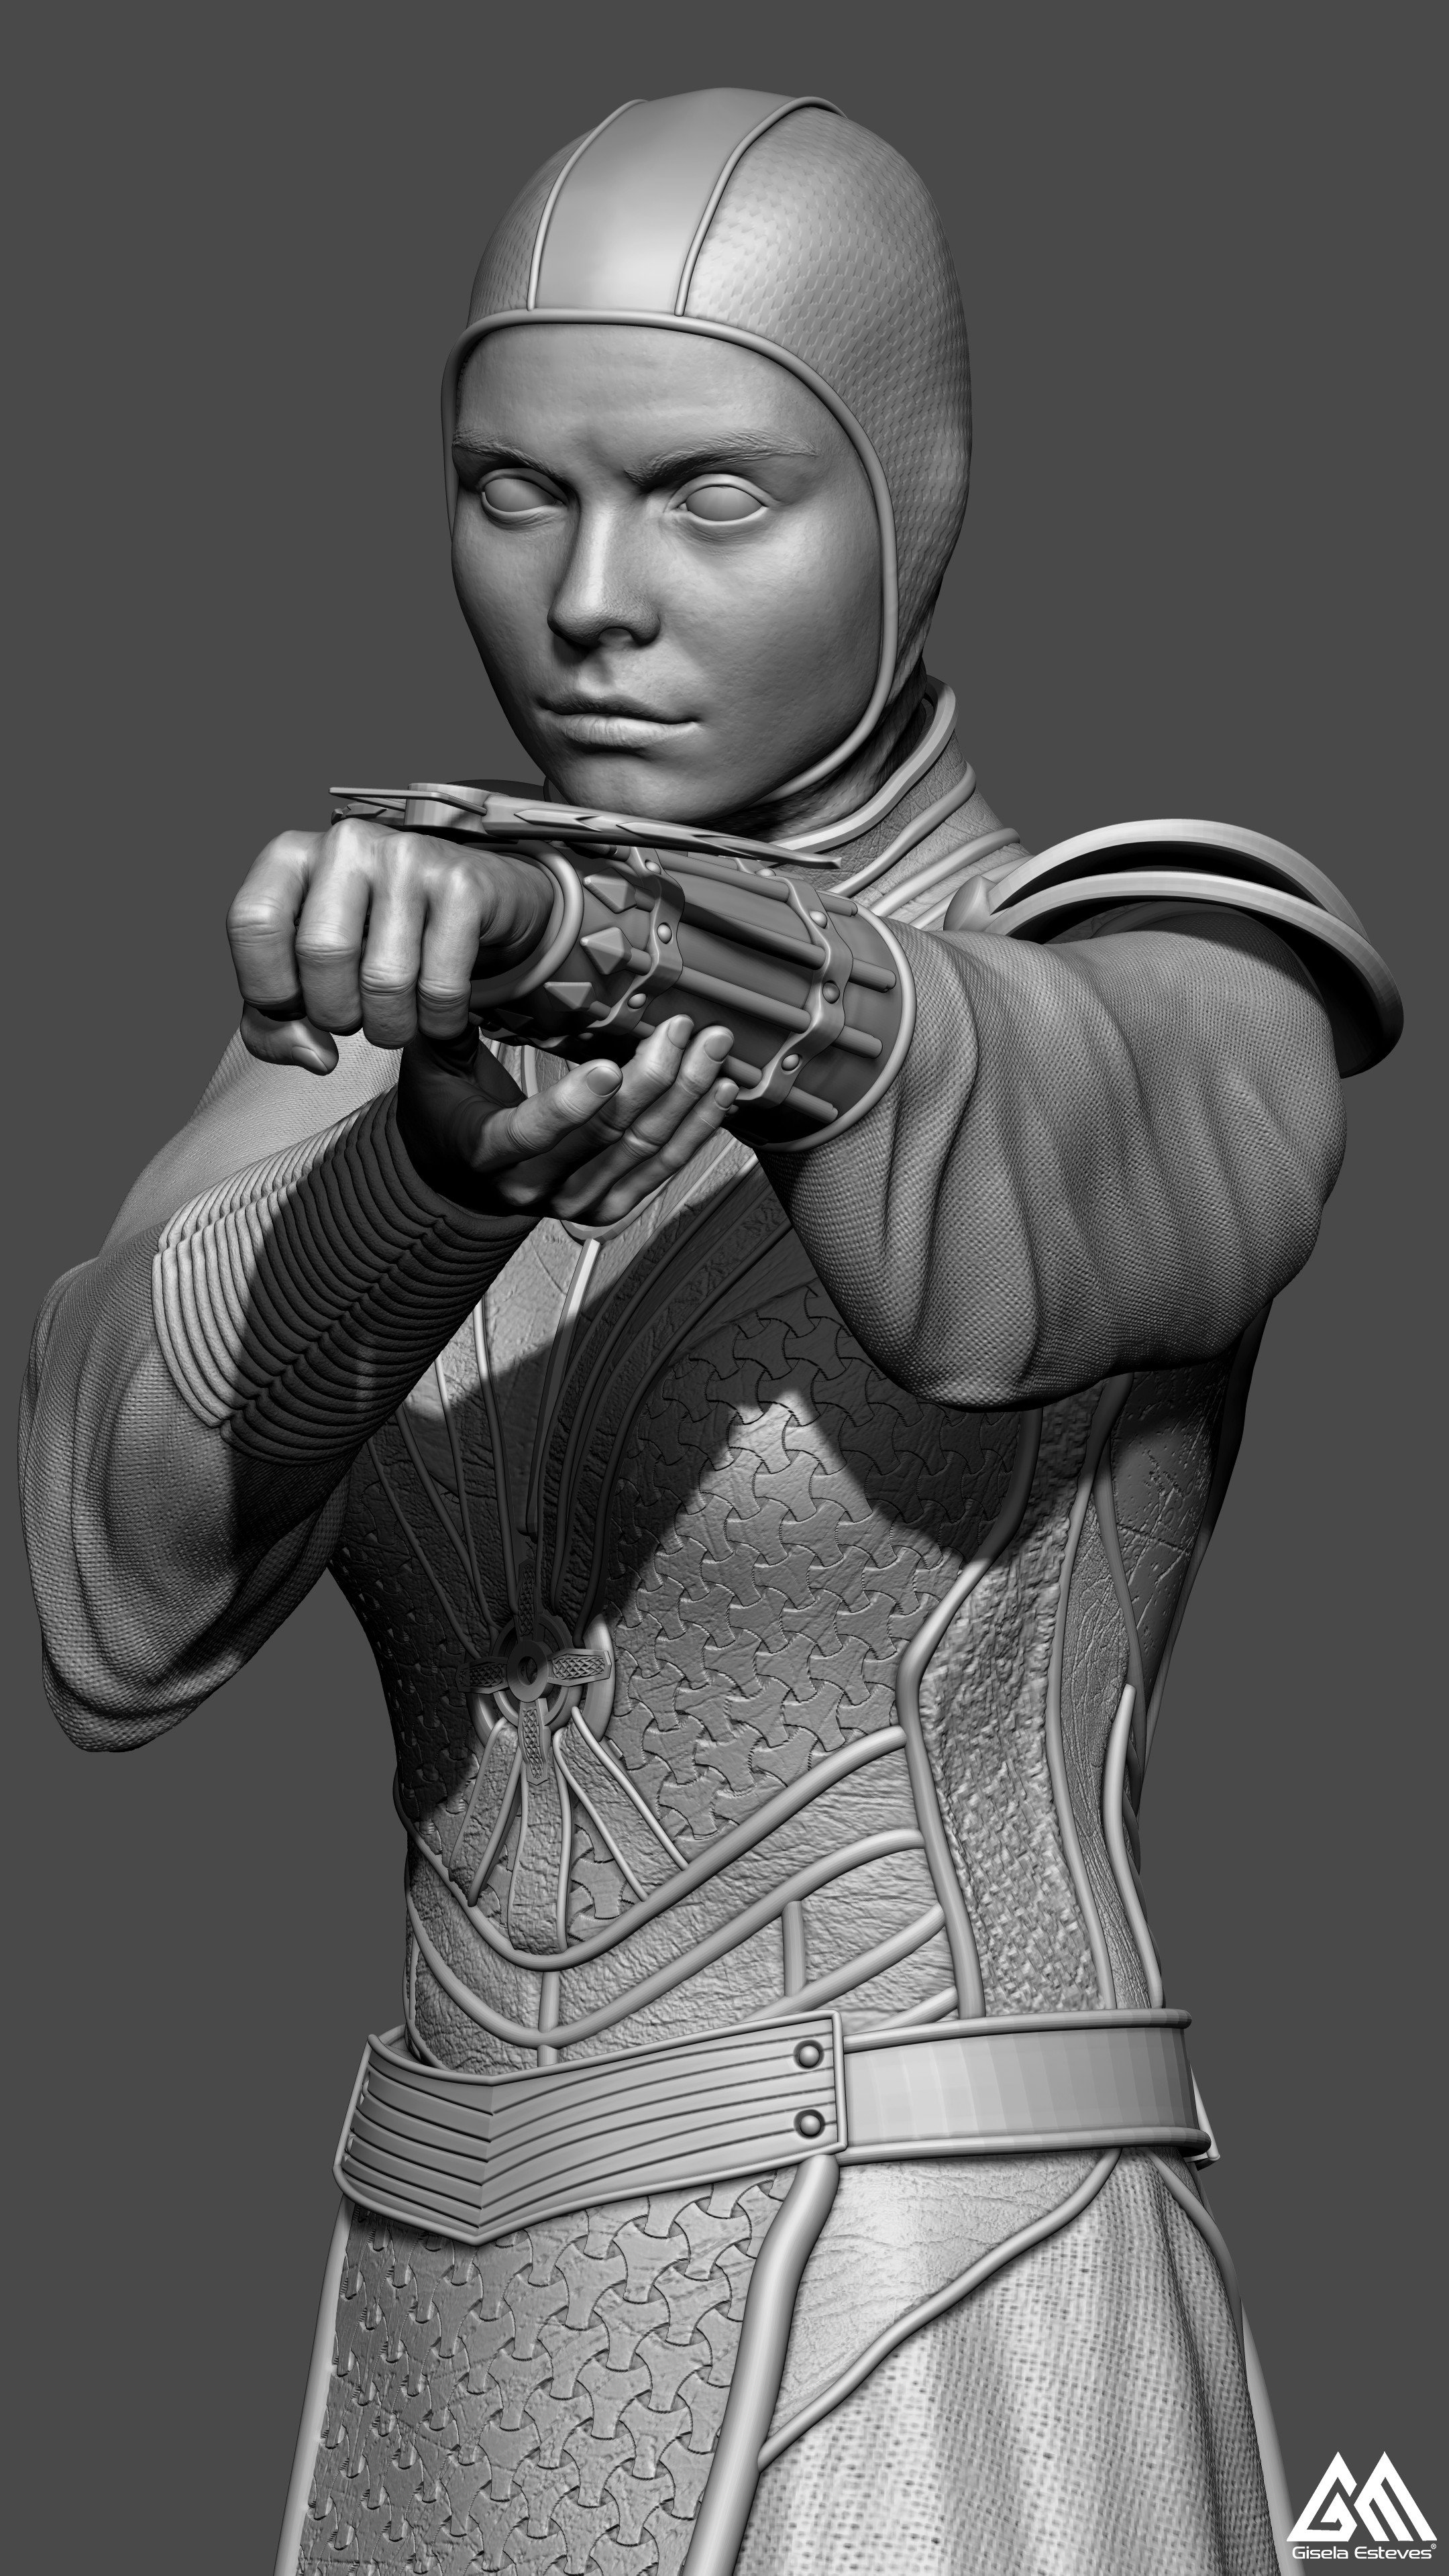
I can also use different brushes and techniques to create a range of textures and surface details to make models as realistic as possible. Such as leather effects like the ones on Beatrice’s armour.
OCS: What is the texture of the 3D printed material?
As mentioned before, to 3D print my sculptures I prefer a Resin 3D printer, below is an example of the ones I use.
Unlike traditional 3D printing, which uses melted plastic to build up layers. Resin printing uses a liquid resin that is cured (hardened) layer by layer using a UV light.
The resin itself is a liquid polymer that comes in a vast variety of colors. When creating a sculpture using Resin 3D printing, the printer begins by creating a thin layer of resin on the build plate. The printer’s UV light then cures the resin in that layer, hardening it into a solid layer. The printer then adds another layer of resin on top of that hardened layer and repeats the process, building up the sculpture layer by layer until it is complete.
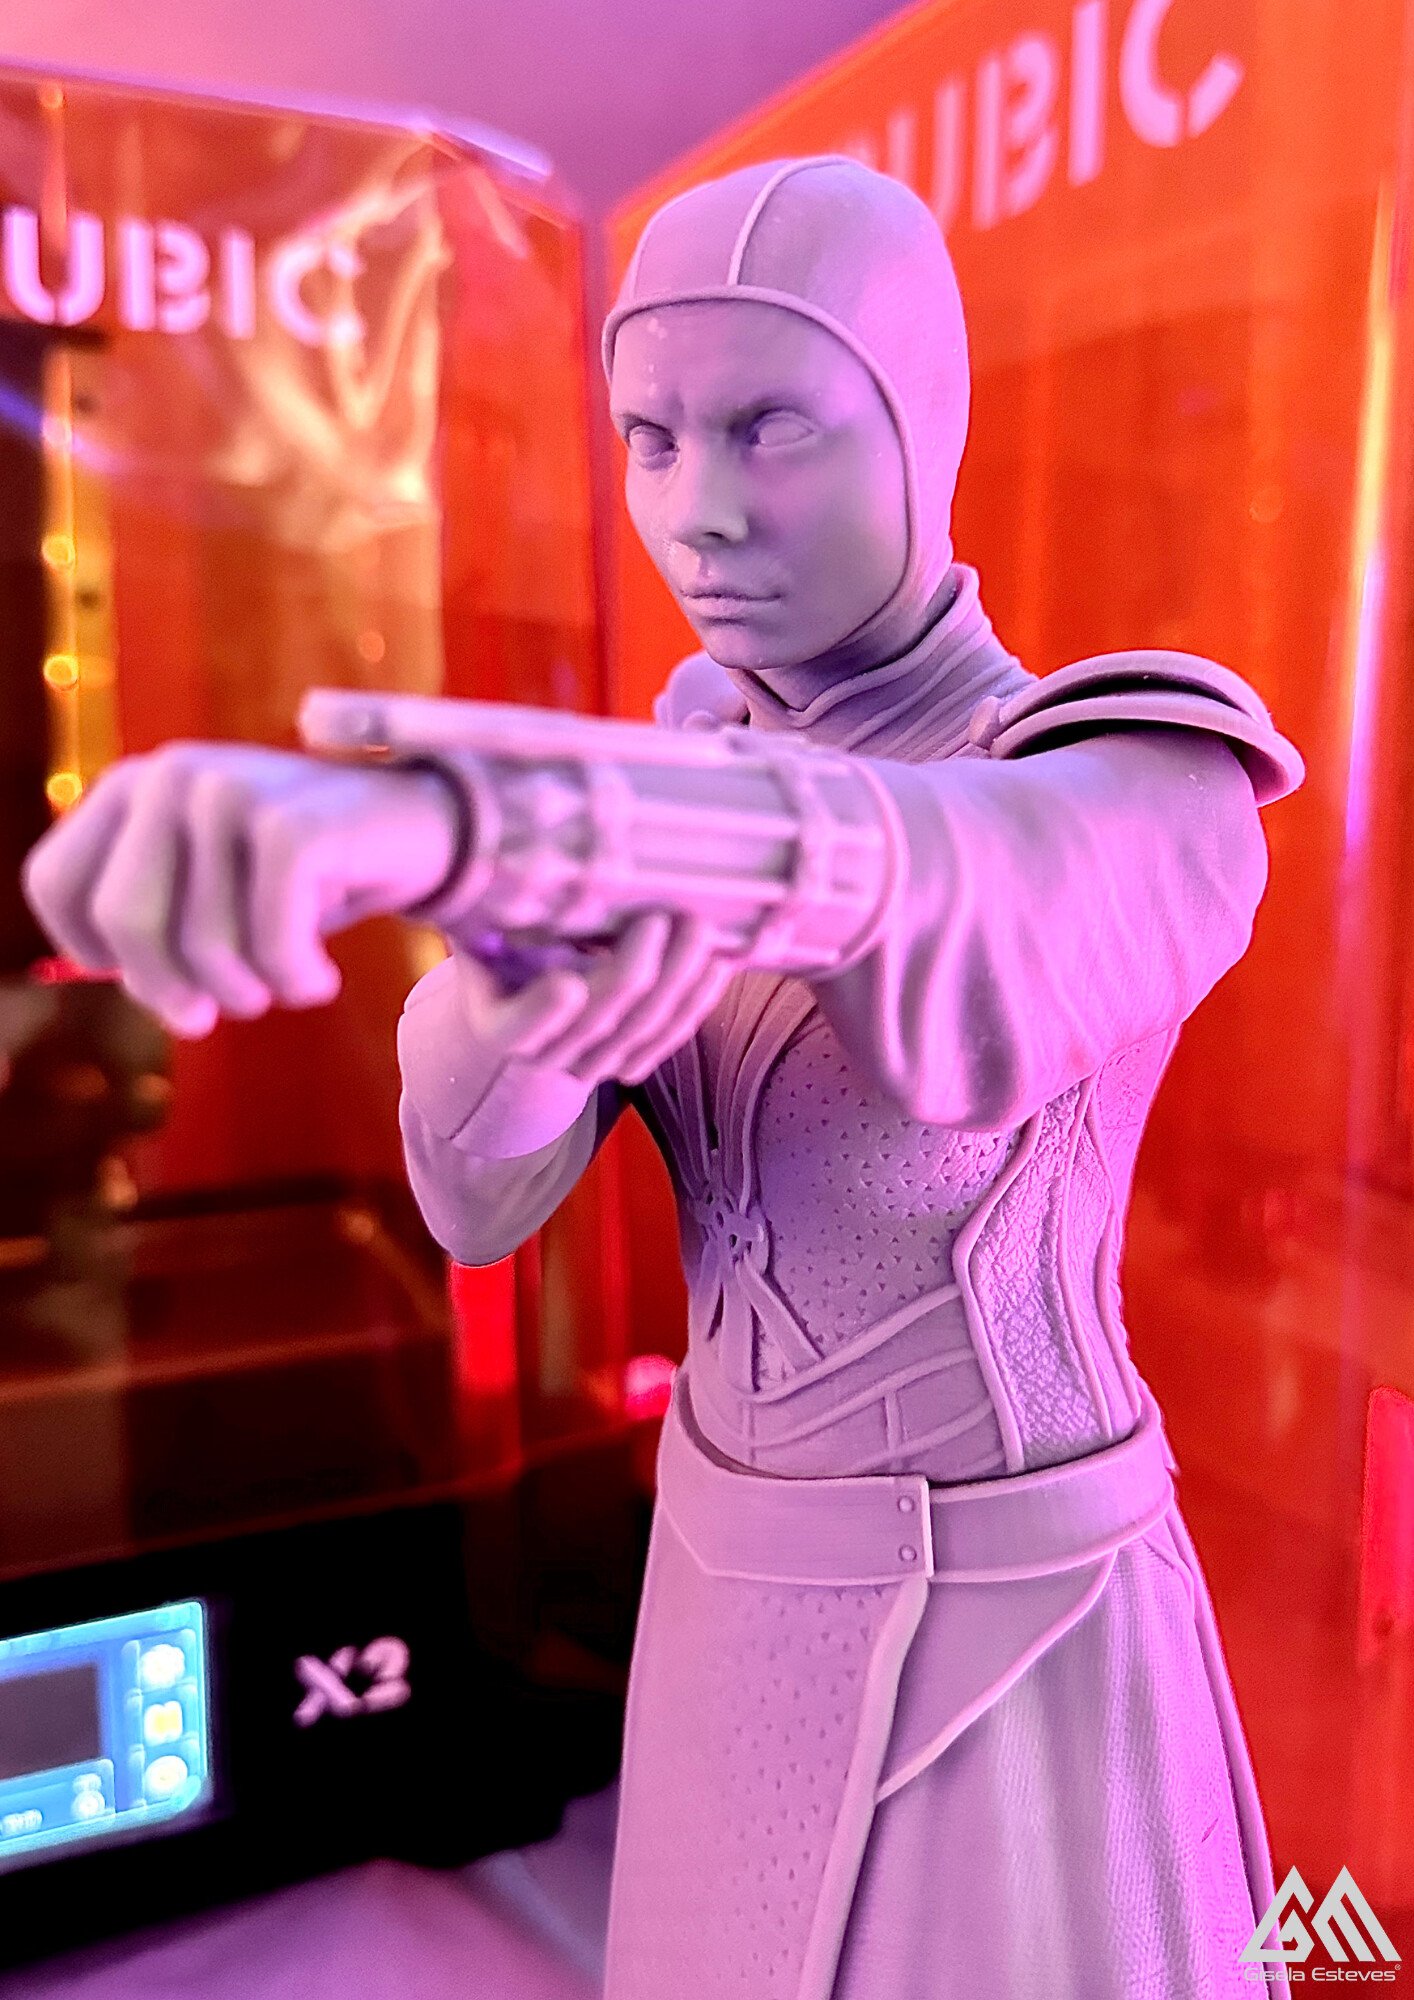
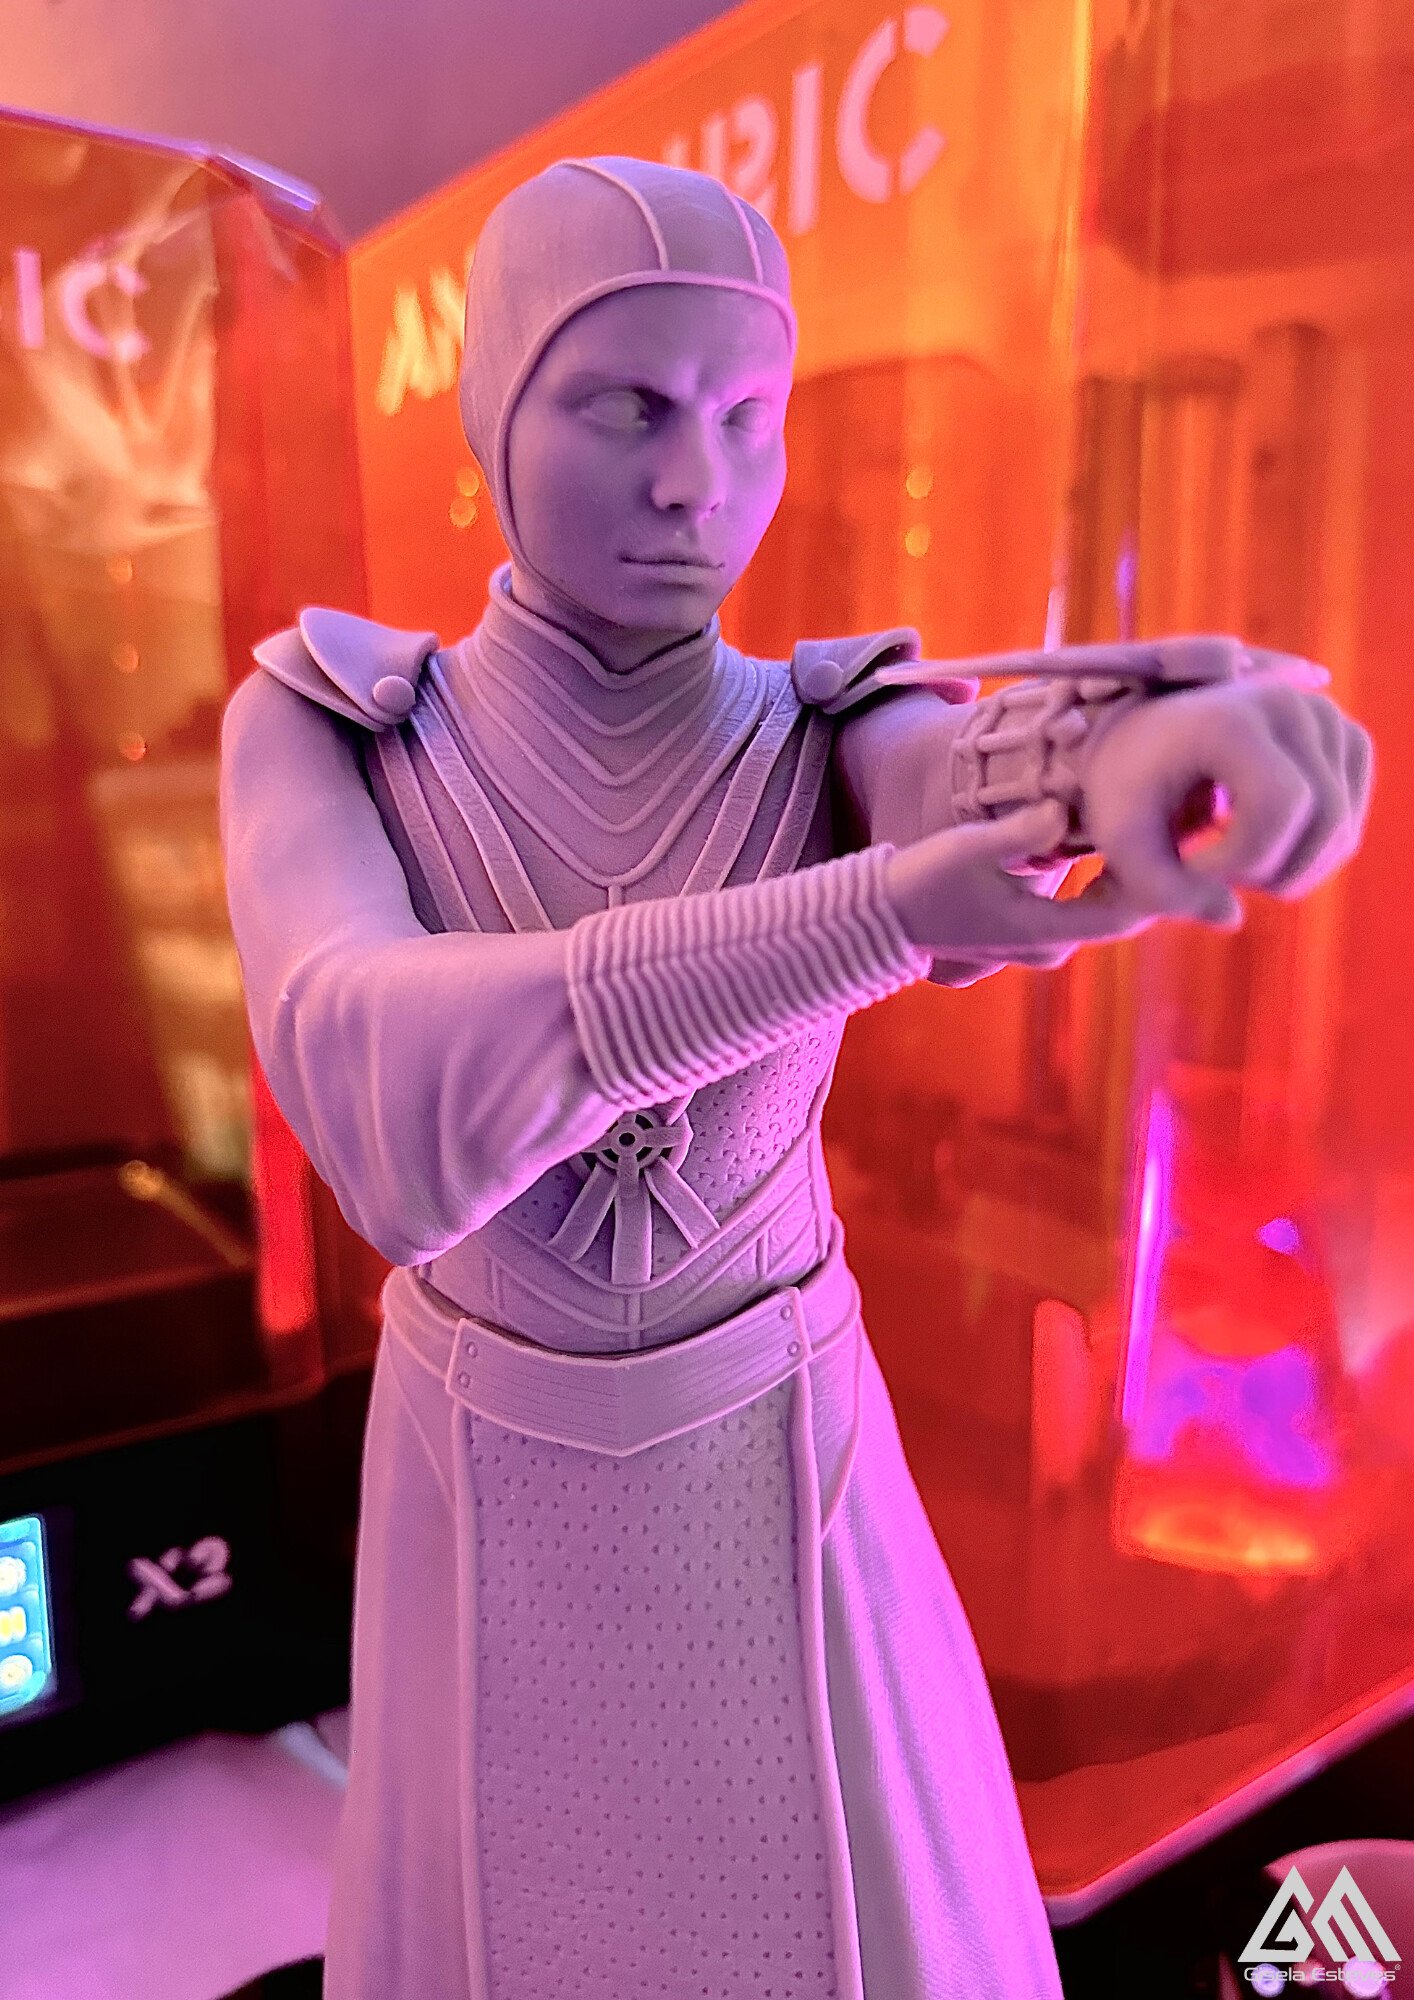
Below is a photo of a printed sculpture.
OCS: How do you put the pieces together? Glue?
When it comes to putting the 3D printed sculptures together, most of the time I go for super glue. During the modeling phase, I make sure to include “keys” in the design, which are essentially small notches or protrusions that are designed to fit perfectly with their corresponding part. Once I’ve printed out all the parts, I start putting them together by applying a small amount of super glue to the keys and then fitting the pieces together. The glue sets quickly, and once it's dry, the sculpture is solid and secure.


For larger sculptures that I want to transport easily I’ve found that attaching magnets to the keys can be a great solution. This allows me to easily disassemble the sculpture into its smaller parts for packing and transportation, and then quickly reassemble it.
Beatrice Sculpture is an example like this. The statue is quite large, and I wanted to be able to easily take it apart and put it back together without worrying about damaging it in transit. By attaching magnets to the keys, I can quickly and easily take the sculpture apart and put it back together again whenever I need to move it.
OCS: When you paint, how do you match the colors to look exactly like the real thing? You paint each piece separately then put it all together, right? What happens if you accidentally mess up on the paint? Does it wipe off easily?
To paint my models, I prefer to use acrylic paints, these are versatile, dry fast and can be thinned with water. When I start a new project, I usually gather as many references as possible of what I want to sculpt, this includes pictures of the subject from different angles and light sources, which will allow me to see the different fabrics and colors that make the sculpture. For Beatrice sculpture I used a variety of techniques such as airbrushing (using an airbrush and a compressor), dry brushing, or glazing. These are some of the techniques that allow me to achieve different effects and create unique textures.
Now I’m no professional when it comes to painting, so a lot of it is trial and error, however, one of the benefits of acrylic paints is that they are relatively easy to remove if you make a mistake. I can use a thinner or alcohol to strip the paint and start over, or apply a spray primer over the sculpture to begin the painting process.
To make the painting process easier, I do keep the parts separated, this allows me to easily reach all the corners and details of the sculpture, this also means that if I make a mistake, I don’t have to remove paint from the entire sculpture and just that part.
OCS: How tall are the Warrior Nun sculptures?
I originally sculpted the statues for a 1/4th scale, this means that the statue is 1/4th of the real object, this is usually measured in a straight line from feet to eye level. In Beatrice's case the statue is 44cm (17.32 inches) from base to the tip of her staff.
OCS: From concept to finished product how long did it take to make the Beatrice sculpture?
I spent a total of around 176 hours sculpting Beatrice Statue and getting it ready for 3d Printing. The process was lengthy, but I was determined to create a high-quality sculpture that would be worth the effort. Once sculpting was completed, it took me approximately 80 hours to print all the parts, due to its considerable size.
After printing was completed, I moved to the painting stage, which took me around 2 days to complete. Overall, the entire project took me around three weeks to complete, but I should note I didn't work on it every day.
OCS: Do you also make YouTube videos? (They are really great!)
After creating a few 3D sculptures, I decided to make short YouTube videos to showcase them. These videos allow me to add more information and details about my sculptures, and also give the audience a better perspective of the scale of the object.
Now, whenever I finish a new sculpture, I create a small teaser video to post alongside it.
I must admit, though, that my video editing skills are still in very early stages. I would love to learn more from the amazing editors in the fandom, so please, someone volunteer as tribute??
OCS: What motivates you to create Warrior Nun content?
Like many of us, Warrior Nun holds a very special and personal place in my heart. I stumbled upon this series a bit later than others maybe, in the month of September last year, during a difficult moment in my life. I had just lost my mom and was struggling to find the strength to carry on. Seeking refuge in my room, I turned to my television, and that's when I discovered Warrior Nun.
It didn't take me long to fall in love with the series. Through Warrior Nun, I saw myself - I saw these incredible characters facing the same pain and conflicts that I was experiencing. For the first time in months, I felt alive. I felt like I had found a sense of belonging, purpose and strength to finally ask for help.
I think the reason why I sculpted Beatrice first was because I connected strongly with her, because like her, pain is what made me a “Sister Warrior”. I’m forever grateful to the strength that she has given me, plus Beatrice is a badass!
So, nowadays, like many others, what motivates me is the fight to save what saved me. I want to fight for something that represents me and so many others. Ultimately, that's what television and film should be about- representing the entire spectrum of humanity and also real life. Because we are all equally important, and we all deserve to be seen and heard.
OCS: Besides shock, what was your response when you saw the fandom’s love after your post?
I must say, “shock” is an understatement for what I'm feeling right now. I knew well the power of this fandom, however, never in my mind I thought I would be at the receiving end of it. I am completely overwhelmed with all the love and support everyone has shown me over the last couple of days. As someone who considers themselves an introvert, I tend to keep to myself and go about my routine quietly. So, when everything “exploded” on twitter, it was like my system went into overload.
However, amidst all the chaos, I want to take a moment to express my heartfelt gratitude to each and every one of you who has shown me love and support. Your kind words, comments and messages have touched my heart in ways I cannot fully express. I am truly humbled by this whole experience.
I want to emphasize that you are all amazing human beings, and I feel blessed to be part of this wonderful family. Thank you again for your love and support. It means the world to me.
OCS: Are there plans to create and sell these Warrior Nun sculptures?
I really want to be able to share these sculptures with all of you, to make this possible my plan is to open a store where people can purchase the 3D model and print their own statues at home, while there are still some details I am still ironing out, I believe this approach will enable me to get things out a bit quicker.
However, for those who are looking for physical copies, please be patient with me. With my full-time job, I may not have as much time as I would like. My current plan is to create a few garage kits that people can purchase and paint themselves.
I'm eager to hear anyone's ideas and feedback to make this plan possible.
OCS: What future Warrior Nun projects do you have planned?
Yes, absolutely. My passion for this project has only grown stronger, and I cannot wait to add Mother Superion and Camilla to my collection. Additionally, I'm eager to sculpt Lilith and Reya, I find their characters particularly intriguing.
While these pieces may take some time to complete, I am excited to take on the challenge and share the final results with you all.
OCS: As promised, Gisela @kcgisela, has given the OCS Newsletter the honor of revealing her high-res rendered photos of Ava’s sculpture along with a message to the fandom.
Keep fighting and continue to spread the love. Your passion and dedication are what makes this fandom so special! #SaveWarriorNun!
Be sure to follow @kcgisela on Twitter for progress updates and future projects.


Halo Glow Effect
OCS: What is the method you used to create the glow effect on Ava's halo?
To achieve the glowing effect on Ava’s Halo I began by 3D printing the base and the halo using clear resin, this material allowed light to pass through as long as I didn’t paint on top of it.
During the sculpting process, I incorporated holes into Ava’s sculpt. These carefully placed openings served as channels for threading the LEDs through her leg, up to her back. Next, I gathered a bundle of LED’s and positioned them within Ava’s back. This placement allowed for an even distribution of the light. Once the LEDs were in place, I attached the Halo to complete the visual effect.
For the halo in the base, I took a similar approach. I made a hole at the bottom of the base and installed additional LEDs. To power the LEDs and conveniently control the halos, I took the initiative to learn soldering. With this, I connected the LEDs to a battery pack. This enabled me to easily turn the halos ON/OFF when needed.
NEW CAMILA Sculpture